Optimal spindle speed, proper cutting depth and tool quality. There are numerous factors which influence the quality of woodworking. How to master them to ensure the perfect result is a question that puzzles many DYI enthusiasts as well as professionals. We have gathered eight basic rules to help you choose the right tool and setting when routing with router bits.
Rule No. 1
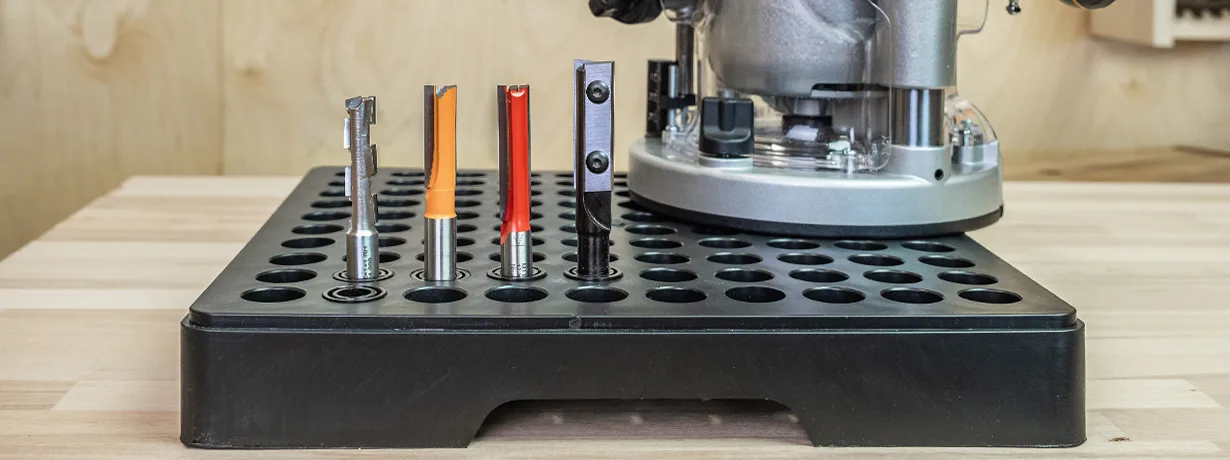
Use High-Quality and Sharp Tool
The quality of cut is directly proportional to the quality of the tool used, especially the condition of its cutting edge. If you decide to purchase a cheap cutter from any hobby market or Chinese e-shop, you should be prepared for imperfect result.
These low-end tools are not balanced in the process of production, so you will probably struggle with excessive vibrations during work. Moreover, they may have unevenly ground cutting edges, making their quality and resistance to dulling far inferior to carbide blades of European production. Only with a perfect cutting edge as well as regular cleaning of the tool to remove accumulated debris can you achieve the desired quality.
The premium quality cutting edges can be found on CMT and IGM router bits. For cleaning tools from burnt dust and resin, we recommend using the CMT Formula cleaning emulsion.
Rule No. 2
Choose Proper Tool According to the Material
Not all cutters are suitable for every type of material. The IGM red line bits or CMT’s brazed router bits are designed for use with various types of wood-based materials, including solid or soft wood, plywood, chipboard, laminate or MDF boards.
Spiral bits are particularly well-suited for solid wood and plywood. For laminate, MDF boards, and very hard or rare woods, tools with diamond teeth and replaceable blades offer optimal performance. For precise details on each tool, refer to the descriptions on the IGM e-shop or in the printed catalog.
When choosing a router bit, check the number of cutting teeth, which is indicated by the letter Z. For example, if the tool is marked as Z2, it means the cutter has two teeth. Generally, a bit with more teeth provides a faster and smoother cut. Additionally, the diameter of the tool affects the cutting speed. If your project allows, prefer a tool with a larger cutting diameter, indicated by the letter D.
 IGM Diamond Router Cutter / CMT brazed bit / , IGM brazed bit / IGM bit with knives
Rule No. 3
Don’t Underestimate Quality and Condition of Your Router and Its Collet
A high-grade and sharp tool is the key. However, if your router isn’t a high-performance model or if it isn’t properly maintained, the results may not meet your expectations. Even with high-quality routers, don’t forget to clean and service them regularly. Check for any clearance in guiding rails of your machine. This could cause misalignment of the tool with the routing axis.
It is advisable to regularly check for damage to the spindle shaft bearing. If the shaft can be turned easily by hand and operates quietly, everything is in perfect condition. If the shaft has a play to sides, it resists turning or makes noise, it’s time to change bearings of the rotor. Working with defective bearings can lead to uneven surface, wood grain splitting or even irreversible damage to the machine rotor.
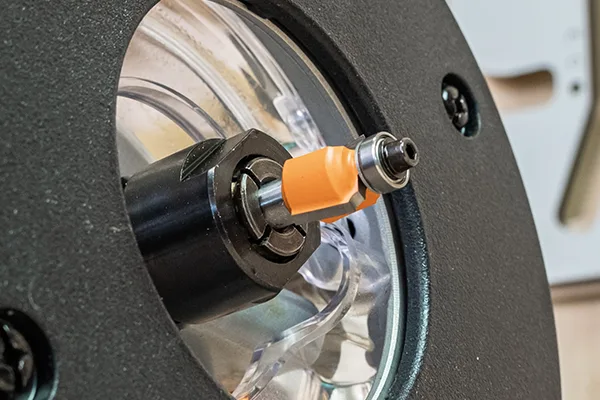
Woodworkers often forget about a collet. Its condition significantly impacts the quality of work with cutters. Regularly inspect the collet and keep it clean. Dust build-up inside causes improper bit fixation, vibrations, pressure marks on the bit and potentially even breakage of the router bit, which can result in serious injury. So, if the collet creates deep marks in the bit shank and you struggle with excessive vibrations during your work, replace the collet immediately.
Rule No. 4
Choose the Right Cutting Depth
Cutting depth is determined by the tool construction, the overall length of the tool and the length of the cutting edge. If you need to make a groove deeper than half the length of router bit’s cutting edge, reduce the feed rate to avoid overloading the router. For shallow grooves, which generate little resistance for both the tool and the router, you can increase the feed rate.
If you want to cut to a greater depth, we recommend doing it in 4 to 5 passes. Reducing the cutting depth decreases tool vibrations, resulting in a much cleaner finished surface.
Rule No. 5
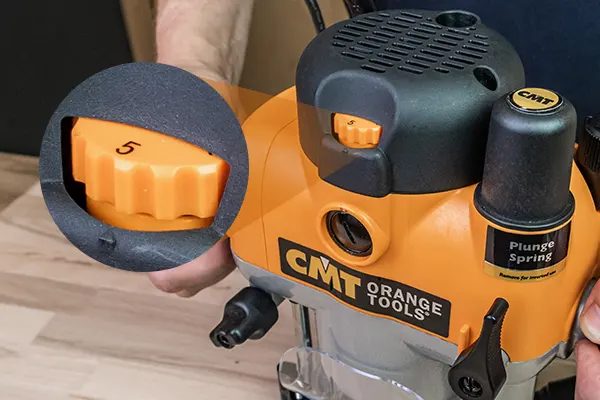
Set the Appropriate Speed
The speed of the router bit is an important parameter that affects not only the quality of your work but also the longevity of your tool. However, be careful, while increasing the speed can improve the quality of the cut, it also increases friction between the tool and the material.
Excessive friction causes the cutter to overheat, which shortens the longevity of not only the cutting edge but the entire tool. Therefore, it’s important to find the ideal speed setting to ensure the best possible results without overheating the tool. The optimal speed depends primarily on the diameter of the tool and the type of the material being processed. The larger the diameter, the lower the speed you should choose.
The optimal speed can be divided into four groups based on the size of the tool:
| Tool Diameter |
RPM |
|
2–20 mm
|
24000–18000
|
|
20–40 mm
|
18000–16000
|
|
40–70 mm
|
16000–12000
|
|
70 mm and more
|
12000
|
Adjust the speed of your tool according to the recommendations provided. If the tool exhibits vibrations, increase the speed slightly. If you notice burn marks on the material due to overheating, you should reduce the speed.
Rule No. 6
Shift the Router in the Right Direction
When routing, the direction in which the tool moves relative to the workpiece is crucial for the final surface quality.
Conventional Cutting (Milling)
When the tool moves in the same direction as its rotation, it is referred to as conventional cutting. In this case, the thickness of the chip gradually decreases, which reduces tool wear and minimizes abrasion on the routed surface. The alignment of the cutting direction causes the workpiece to be drawn towards the tool, so it is important to maintain a constant feed speed of the router.
Climb Cutting (Milling)
When the tool moves against the direction of the cutter’s rotation, it is known as climb cutting. In this process the chip thickness gradually increases, which results in faster tool wear along with higher heating and friction against the material. This method pushes chips ahead of the tool and routs them repeatedly, which can lead to tool overload. The opposite direction of rotation also causes the tool to be pushed away from the workpiece.
In most cases, the most appropriate method is conventional cutting. If you cut manually with a router and the workpiece is positioned underneath it, you should shape the closer side of the workpiece from left to right. If you are using a router mounted in a router table to cut the far side of the workpiece, you should move the workpiece from right to left.
Rule No. 7
Think about Characteristics of the Material
Since wood is not a homogenous material, it doesn’t have a uniform structure. No two pieces of wood in the world are exactly the same. This must be taken into account when routing. It’s important to consider the grain direction, wood density, knots, moisture content, and the porous structure of each specific wood type. Especially when working with solid wood, pay particular attention to routing against the grain, as it creates significant resistance to the tool and is highly susceptible to splintering.
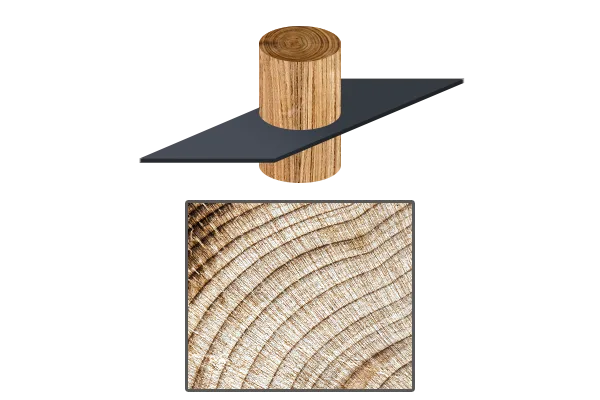
End-grain cutting
Longitudinal radial direction
Longitudinal tangential direction
For interior woodworking projects, properly dried wood is essential, with an ideal moisture content ranging between 8-12 %. If your wood has a higher moisture content, it can quickly clog the tools during work, and residues of wood shavings may adhere to both the tool and the wood. This can result in warping or even cracking of the finished product. Low indoor humidity causes the wood to gradually dry out, leading to mechanical changes such as warping, bending or the development of cracks.
A wood with a moisture content below 8 % is mostly used for the production of musical instruments. A moisture content of around 15 – 22 % is commonly found in materials for building constructions.
Rule No. 8
Practice Is the Best Teacher
Even the best theoretical knowledge and reading all described rules won’t guarantee the best results without mistakes. True mastery comes only through practice. Take all the rules described here as a foundation for better understanding of this topic and be sure to follow them during your work.
Use scraps of various materials and try out each technique yourself. Practice cutting grooves or rabbets, shape the edges of the workpiece at an angle or radius and try routing with the aid of templates and guide bearings. As you become familiar with how each tool works, there will be no problem for you to choose the right cutting parameters. You’ll learn what to avoid and recognize the right time to sharpen your tools.
Always respect your router, the bit, and the material you’re working with. Never forget to follow safety guidelines, and always wear protective glasses and respiratory protection.
Solving the Most Common Problems when Routing
Solutions
Decrease
Increase
Cutting depth
Vibrations *
Rotation speed
Dust extraction
Number of cutting edges
Clamping cutter/chuck
Rotation speed
Vibrations *
Rotation speed
Number of cutting-edges
Rotation speed
Feed speed
Dust extraction
Rotation speed
Cutting depth
Machine stability
Workpiece firmness
Feed speed
Cutting depth
Vibrations *
Shank diameter
Collet clamping
Change cutting tool
* How to decrease vibrations? It is important to know that vibrations may be caused by many factors, such as tool wear, insufficient collet force, improper cutter clamping or incorrect combination of feed rate and rotation speed. To reduce vibrations, it is appropriate to select higher RPM, but be careful not to increase it too much to avoid overheating. The tool should be only as long as necessary for the task. Longer tools are prone to vibrations. Ensure that the cutter is inserted into a clean collet up to “K” mark on the shank and tightened securely.