Making a Table Saw Sled for Crosscuts
Many custom furniture makers and cabinetmakers use only a well-tuned table or stationary saw.
However, you can achieve better results and finer cuts with a simple addition of a Saw Sled to your woodshop.
A Saw Sled is a sliding board with stops that moves in the T-slots of a tablesaw. This setup keeps the work from slipping and ensures a clean, perfectly square cut every time.
Step by Step Instructions
Although the miter gauge that comes with your saw can be used for crosscutting, it's less safe and accurate than a well-made sled.
Using our Step By Step Guide, you can make your own sled in about two hours and for the affordable price of about 40 Euros.
You will need the following: 12 mm thick plywood, two hardwood boards at least 600 mm long, two carriage bolts 5 mm with nuts and washers and a couple of screws.
Size the sled to fit your needs
We are constructing a 900 x 600 mm sled.
Our model is designed for a stationary table saw Laguna Fusion 3 with a 250 mm blade. This saw features a spacious cast-iron worktop and is ideal for a sled of this size. We suggest sticking to a size of about 700 x 450 mm. This sled handles anything from the finest cuts to stock up to 550 mm wide.
You must remove the riving knife before use and keep your hands as far from the blade as possible!
Building the Sled
First, size your plywood accordingly, in our case that is 900 x 600 mm.
Handy Tips
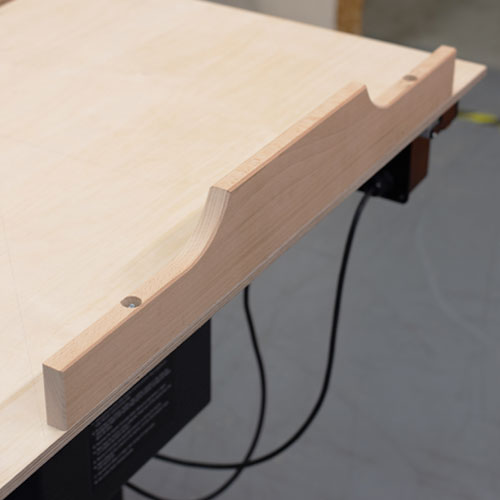
Draw an outline for the front and back handle, the handle should be larger in the middle to prevent cutting through it with a saw blade, the handles strengthen and hold the whole sled together. Our handle is 100 mm high in the middle and lowers towards the edges to facilitate handling of a workpiece. You cut the shape of the handles on a bandsaw or using a jigsaw. Sand the edges using an oscillating spindle sander or manually. The handles do not have to cover the whole width of the sled. In our case, the handles are 700 mm wide and made of a 20 mm thick planed beech. We also altered the edges using a roundover 45° chamfer bit.
Assembly and Drilling
Proper assembly and placement of the front handle are paramount when it comes to precision of cuts to be made. The placement should therefore be adjustable in case of inaccuracies. We will use two carriage bolts 5x60 to assemble the handles to the base. To make the handle adjustable, we need to drill holes 1 mm larger in diameter than the carriage bolts. We used a 6 mm drill bit. Even a 1 mm increase should help with later adjustments of the handle to the saw blade by approximately 3°.
We need to drill blind holes of slightly larger diameter from the top side of the handle to sink the nut and washer. We used a 16 mm drill bit and drilled to the depth 15 mm. We used the same bit to sink the screw into plywood, we only drilled this hole to the depth of 4 mm to sink the screw.

Drill the blind hole first and then the through hole for the screw, otherwise, the tip of the bit would not be guided properly and would slip in the hole for the screw. The back handle only reinforces the whole sled, therefore, we do not need to make it adjustable. You can then fasten the handle to the base with regular screws. Assemble both handles to the base.
Blade Guard Box
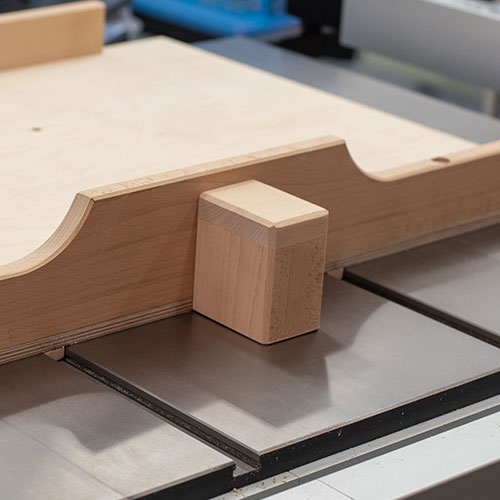
To make the sled safe and prevent injury, you need to make a blade guard on the front handle that will house the blade when it passes through the front handle of the sled.
To size it up, eject the saw blade to its maximum height. The crosscut sled is mainly used for smaller pieces, usually 5 cm thick. We sized the sled for a 6 mm saw blade ejection. To determine how much the disc will come out through the front handle, place the sled next to the ejected blade so that the lateral axis of the disc extends into the center of the front handle. In our case, that was 8 cm in length and 6 cm in height, the blade guard box should then have dimensions of at least 10 x 8 cm, the width does not really matter, we chose 6 cm.

It is ideal to make a box with a hollow inner part so that the blade has space for sawdust and cooling, but you can also make it from a solid block. Most importantly, the blade must not saw through the box. Then we attach the guard box to the sled either with screws or wood glue.
Attention! The screws must not be in the box axis through which the blade will pass.
Prices Runners
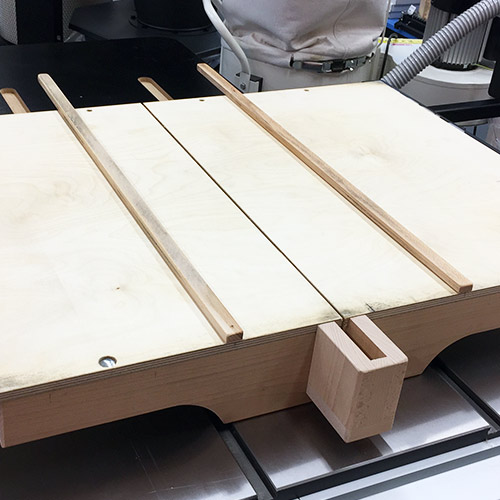
To secure precision and parallel run, we must attach runners to the sled. Measure the dimensions of the slots and make hardwood of the same dimensions with the highest possible accuracy, in our case that is of beech 19 x 10 mm. The more accurate the runners will be, the more accurate the cuts on the sled will be.
Place the runners in the slots on your table saw and also place the assembled sled over the table. Place the sled on the saw so that its axis is exactly on the blade axis. Slide the rip fence to the side of the trolley to verify or adjust the parallelism of the sled to the saw blade. Then use a pencil to mark the position of the runners with respect to the trolley structure to determine where to drill the screw holes to connect the sled to the runners.

Remove the sled from the saw and drill at least three and three screw holes in the plywood according to the markings. We used screws 3,5 x 20 mm and a 4 mm drill bit. Countersink the holes to 90° after drilling so that the screw head hides under the sled's surface. Place the sled on the table again against the rip fence and clamp the sled to the table saw.
Use a small 2 mm drill bit to pre-drill the holes for the screws and the runners to prevent them from bursting when tightening the screw. Then use six screws to bolt the runners to the sled.
Installing Stop Bolts
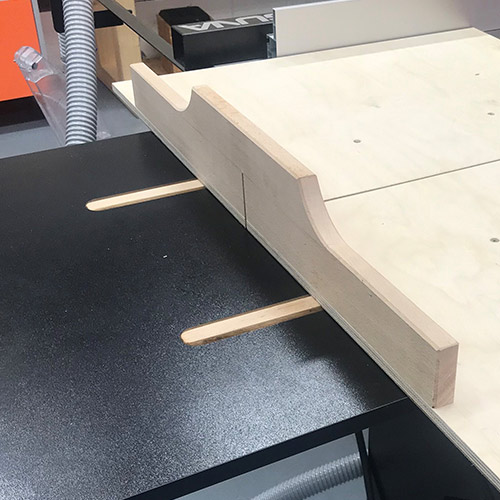
For proper functionality and safety, a stop must be attached to the sled to limit its movement on the saw and to prevent the guard box from being cut through. In the case of the IGM Laguna Fusion 3, it is sufficient to select the length of the guide rails, since the longitudinal slots are not completely through the rear table and the sled stops by itself.
If you however, have through slots on your table saw, use a short offcut from the runners to make a stop (19 x 19 mm). Screw it to the front underside of the sled

so that it stops against the front edge of the table when the blade crosses through the front handle with its highest part. Alternatively, you can attach a mechanical stop (board) to the formatting table using two clamps.
Finally, slide the sled into the slots, set the blade height to 6 cm and slowly cut a groove into the sled until it stops, the blade should not pass through the guard box in the front.
Make several test cuts, check the angle and adjust the front handle if necessary.
The construction shouldn't take you more than two hours and should cost about 40 Euros.
Back to what's new