Building kitchen panel doors may seem a bit complicated, however, we are sure that with the help of this article and the attached video, it will be a piece of cake.
There are two ways to profile the frame and the panel:
1. With cutter heads and a spindle moulder.
2. With a set of router bits and a router in a router table.
We've chosen the first way, using a set of cutter heads and a spindle moulder.
Equipment used:

You will need:
2x planed workpiece for rails, 2x planed workpiece for stiles, battenboard panel (you can also use glass or plywood as a panel).
1.Sizing the panel, rails and stiles
It's important to size your panel as well as rails and stiles before you start profiling.
Type of used material depends on the cutter head. In our case, the IGM One piece Rail & Stile Cutter Head allows us to pick a material from 22 to 28 mm thick. We have gone for 26 mm for the frame and 20 mm for the panel. Usually, the panel is made of thinner material than the frame, the reason is the low weight of the door with less strain on the hinges on the mind. However, you can choose the panel thickness on your own, depending on your preference.

Our door will be 600x400 mm and the frame will be 60 mm. The stiles have to be at least 600 mm, it can also be a bit longer to facilitate glueing (you can size the door in the end).
The rails have to be precisely cut according to the width of the door.
Example:
Door width 400 mm, frame width 60 mm, cutter head profile depth 12 mm.
Calculating the length of rails:
400 - 2 x 60 + 2 x 12 = 304 mm (Width of door - 2 x width of frame + 2 x depth of profile)
2. Profiling the frame
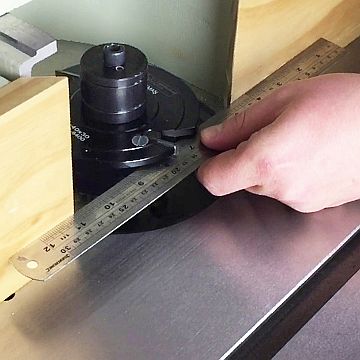
Fasten the IGM One piece Rail & Stile Cutter Head into your spindle moulder and set the depth of the fence for the cut of the head (12 mm) using a flat ruler, that is the depth of the profile of the cutter head.
Place the ruler on the lowest knife of the cutter head, spin the cutter head towards the highest point and set the fence according to the ruler. The ruler should be touching the fence on both lengths and the cutter shouldn't be able to push the ruler when turned, it should only graze it lightly.


You've now set the depth of profile, now we have to set up the height of the cutter head according to the frame material.
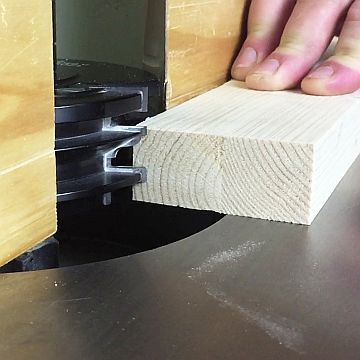
The lower half of the cutter head is used to profile the frame, the head cuts the groove and the decorative profile. The top edge of the knife for decorative profiling should be in line with the top edge of the material or slightly above the frame, now you can lock the height of the shaft.
Shift the power feeder over the worktop. The rollers should be set up at least 1 cm away from the knives and set with a slight toe-in (the back roller should be app. 1 cm closer to the fence than the front roller). That way, the feeder will push the material into the cut more effectively.
Set the height of the rollers according to the thickness of the material and try profiling a sample first. Use protective equipment and keep safety measures in mind when working with a spindle moulder, avoid wearing anything with loose sleeves or jewellery on your wrist like watches or bracelets etc.
If the sample is ok and the height and width fit, you can start profiling all parts of the frame.

3.Cutting contra profiles of the frame
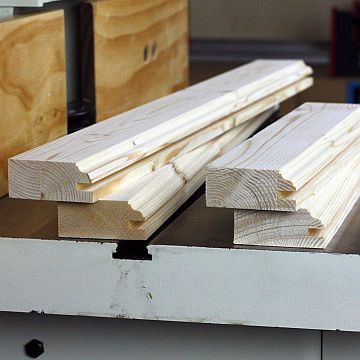
There's no need to switch the tools when cutting the contra profile, you simply have to alter the height of the cutter. We've used the lower half of the cutter head for profiling, now we'll profile with the top half.
Set up your contra profile height by aligning the already profiled piece with the cutter head. Lower the cutter head and set the height according to the groove for the panel. The top and low edge o the groove in the profiled piece must be aligned with the groove in the profile knife.
Only cut a contra profile on rails. Place a piece of scrap behind your workpiece to avoid burr. In this case, we're not using the feeder but rather a mitre fence, since we're profiling against the grain.
Profile the pieces upside down. Profile a sample first and see if it fits the other profiles. If the height and width fit, cut the rest of the contra profiles into both sides of the rails.
Finish the profiles using a fine abrasive and try completing the frame.
4. Profiling the panel
You can calculate and prepare the size of the panel according to the size of the frame.
Calculation:
height of the door - 2 x width of frame + 2 x depth of profile
Example:
600 - 2 x 60 + 2 x 12 = 504 mm
The width of the panel matches the calculated length of the rail (304 mm) - dilatation (2 mm).
We recommend a width dilatation of 2 mm on one side, the width of our door is 302 mm then. By expanding the width, you allow the panel some space when the wood starts to expand or shrink; this way, you can avoid any spontaneous cracks.
Fit the spindle moulder with a panel raised cutter head, we have used the IGM Panel Raised Cutter Head Z2. This cutter head profiles from the top and pushes the panel to the worktop. An upper removal cutter head is not suitable for manual feed, that is why we recommend using a power feeder.
Set the depth of cut using a ruler. Observe the back part of the edge of the knife against the fence, set the depth in a way that you use the whole length of the panel profile; the fence must not be set behind the cutter.
 Now we will set up the height of the cutter head according to the height of the material. Place the panel on the worktop and align the height of profiling. The height depends on you since it influences the height of the panel against the frame. You should leave at least a 5 mm non-profiled mortise for the groove on the frame. We left 5 mm (to fit the frame) + 5 mm to mount from the other side of the door, that will later be sized with an IGM Rabbeting Cutter Head.
Shift the power feeder over the worktop and set its height according to the panel height.
Test your settings on a sample first.
Start profiling the panel against the grain first, that way, you will finish profiling along the grain and avoid any burrs on the finished workpiece.
Use a sanding block or abrasive sponge to finish up the panel.
5. Rabetting the back of the panel.
In order for the panel to fit the frame, it needs to be 5 mm thick (4,8 mm for simpler fitting), our panel is 10 mm so it needs to lose 5,2 mm using the IGM Rabbeting Cutter Head.
We set up the rabbeting cutter and set up the depth and height of the rabbet using the marks on the panel. The rabbet depth must be at least 12 mm, which is the depth of the rail and stile cutter head, we have chosen the depth of 15 mm so that the half-groove is visible from the back side of the door as well.
We start in the same way as before by profiling against the grain to avoid burring.
6. Completing the frame and glueing
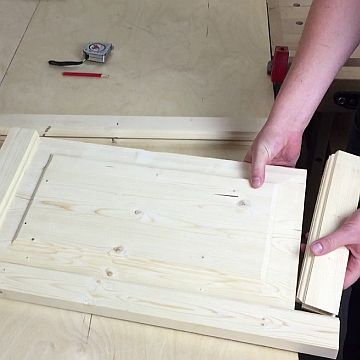
All the pieces you need are profiled and ready for assembly.
We recommend completing and finishing the frame before glueing.
This applies to the panel as well, it is better to veneer or paint it before glueing.
The panel must always be a bit loose in the frame since its size will change throughout time, it should not be glued to the frame.
Painting the panel after glueing prevents the paint to reach all nooks and grooves, those could start showing when the paint dries, or you could accidentally glue the panel to the frame using the paint or veneer.
It's best to paint the panel and frame separately, use silicone to hold the plane in the frame and later glue using a Titebond Original Wood Glue, use a wet cloth to scrape away any glue spills.
Use the IGM Parallel Jaws to hold the frame after glueing, these provide a strong hold without damaging the door.


Release the clamps when the glue sets and size the door to a required length, use a sander to finish the edges and paint the rest of the door.